Banana Coconut Walnut Bread

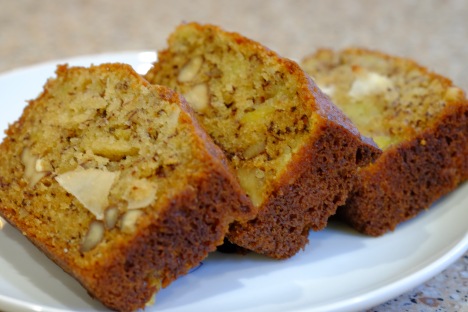
I think I’ve found my new favorite Banana Bread! This has got to be THE most flavorful and moist banana bread I’ve ever had the pleasure of eating. The recipe comes from one of my favorite eateries in Comfort, Texas called High’s Cafe & Store…a darling little place with fabulous food! If you’re ever in the area, do yourself a favor and stop in! They’ve just come out with a great little cookbook, too, called High Made Food.

I think the secret to this banana bread is baking the bananas “in their skin”, then cooling them before peeling and adding them to the batter. Whaaaaat, you ask? Yep, I’d never heard of doing that either, but boy, does it make a difference! Baking the bananas intensifies the flavor and the sweetness! What you’ll get is the most moist and flavorful banana bread you’ve ever tasted. Can we get a big AMEN to that??

Banana Coconut Walnut Bread

Banana Coconut Walnut Bread

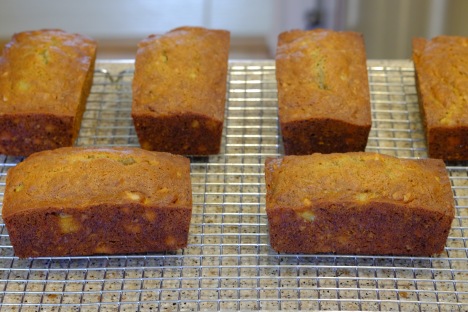
Makes 6 medium loaves

Makes 6 medium loaves

Banana Coconut Walnut Bread

Recipe from High’s Cafe & Store, Comfort Texas

Ingredients:

  • 2 ½ cups flour
  • 2 teaspoons baking soda
  • 1 teaspoon salt
  • 1 cup toasted walnut pieces
  • ½ cup coconut (I used unsweetened coconut chips)
  • 6 very ripe bananas, baked and cooled
  • 2 cups sugar
  • 4 eggs, beaten
  • 1 tablespoon vanilla
  • 1 cup vegetable oil

Preparation:

For the bananas: Preheat oven to 350 degrees.  Prick 6 ripe bananas (NOT peeled) with a fork, and place on a foil lined cookie sheet.  Bake for 20 minutes, then remove and let cool.  They will be black and very sweet!

In mixing bowl, whisk together flour, soda and salt.  Add walnuts and coconut, and mix well.  In a separate bowl, add bananas and sugar and mash well with a potato masher, leaving some chunks of banana.  Add vanilla, eggs and oil and mix well.  Add banana mix to the flour mix and use the masher to blend together.  Portion into 6 prepared medium loaf pans (2 ½” x 5″).  Bake in a preheated 350 degree oven for 20 minutes, rotate and bake another 20 minutes.  Bread will be slightly pulling away from the sides and just set to the touch.  Cool at least 20 minutes before unmolding.


Liz’s Tidbits:

  • This recipe makes 6 medium-sized breads or 2 large. The batter can also be used for muffins.
  • These freeze really well for up to about 4 months!  Cool completely, then wrap each loaf in plastic wrap several times.  Then, either wrap in foil or slip into a freezer bag.

If you like this recipe, feel free to Tweet it, Facebook it, or just email it by clicking the “share” button below. 🙂

Mom’s Rich Cocoa Crinkle Cookies

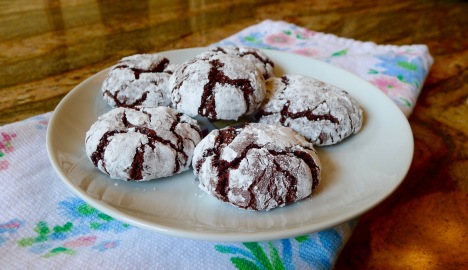
About a year ago, Mom moved from Oregon back to Texas.  There’s a saying that you can take the girl out of Texas, but you can’t take Texas out of the girl! We are all VERY happy to have her back here where she belongs!  With that said, Mom loves to bake! I’m not saying we wouldn’t love her just as much if she didn’t, but let’s just say we love it that she does!  These chocolate crinkle cookies are TO…DIE…FOR!  Rich chocolate bites of chewy goodness that completely satisfy that chocolate craving!  Be careful…they’re so good you might find them disappearing just as quickly as you take them out of the oven!

Mom's Rich Cocoa Crinkle Cookies

Mom’s Rich Cocoa Crinkle Cookies

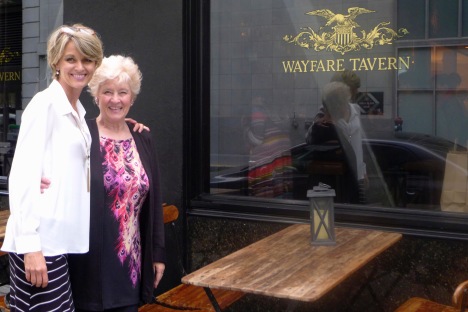
Mom & Me at Tyler Florence's Wayfare Tavern in San Francisco

Mom & Me at Tyler Florence’s Wayfare Tavern in San Francisco

Mom’s Rich Cocoa Crinkle Cookies

makes about 6 dozen cookies

Ingredients:

  • 2 cups sugar
  • ¾ cup vegetable oil
  • 1 cup Hershey’s cocoa
  • 4 eggs
  • 2 teaspoons vanilla extract
  • 2 ⅓ cups all purpose flour
  • 2 teaspoons baking powder
  • ½ teaspoon salt
  • powdered sugar

Preparation:

Stir together sugar and oil in a large bowl.  Add the cocoa, beat until well blended, then beat in the eggs and vanilla. Stir together flour, baking powder and salt, then gradually add the cocoa mixture, beating well. Cover and refrigerate until dough is firm enough to handle, at least 6 hours.

Heat oven to 350°, and line a cookie sheet with parchment paper (if no parchment, spray with nonstick spray). Shape dough into 1-inch balls, roll in powered sugar to coat then place about 2 inches apart on prepared cookie sheet.

Bake 10-12 minutes or until almost no indentation remains when touched lightly and tops are crackled. Cool slightly, then remove  to a wire rack to cool completely.

If you like this recipe, feel free to Tweet it, Facebook it, or just email it by clicking the “share” button below. 🙂

SaveSave

Fresh Peach Coffee Cake w/Pecan-Cardamom Streusel

Fresh peach season is quickly coming to an end, but, luckily I had enough left for this amazing Fresh Peach Coffee Cake. Southern Living Magazine featured the recipe earlier this summer, and it looked amazing!  Cinnamon and cardamom are perfect partners for the juicy peaches, and the streusel takes it over the top! Who doesn’t love the smell of coffee cake baking in the oven?  If you’re a peach lover like me, I think you’ll love this cake.  Bake it up, grab yourself a slice early in the morning and snuggle up with a cup of coffee…PERFECT!

Fresh Peach Coffee Cake w/Pecan-Cardamom Streusel

Fresh Peach Coffee Cake w/Pecan-Cardamom Streusel

Fresh Peach Coffee Cake w/Pecan-Cardamom Streusel

Southern Living Magazine

Streusel:

  • 1 cup chopped pecans
  • 1/2 cup packed light brown sugar
  • 1 teaspoon ground cinnamon
  • 1 teaspoon kosher salt
  • 3/4 cup all-purpose flour
  • 1/2 cup granulated sugar
  • 1 teaspoon ground cardamom
  • 1/2 cup cold unsalted butter, cut into pieces

Cake:

  • 2 teaspoons baking powder
  • 1 1/2 cups all-purpose flour, plus more for pan
  • 3/4 cup granulated sugar
  • 1/2 teaspoon ground cardamom
  • 3/4 cup heavy cream
  • 2 teaspoons vanilla extract
  • 1 large egg
  • 4 tablespoons unsalted butter, melted
  • 2-3 ripe peaches

Preparation:

Pecan Streusel: Preheat oven to 350°F. In medium bowl, stir together pecans, brown sugar, cinnamon, salt, flour, sugar and cardamom. Add cold butter pieces, and combine with fingers until a sandy texture is achieved.

Cake: Sift together baking powder, flour, sugar, and cardamom. With an electric mixer on medium-high speed, beat cream, vanilla, egg, and melted butter until frothy, about 1 minute. Fold in the flour mixture with a spatula until blended, taking care not to overmix.

Slice each peach into 8 wedges. Transfer the batter to a lightly greased and floured 9-inch springform pan, and smooth the surface. Arrange peach slices evenly over the batter, and cover the top evenly with the streusel, pressing lightly.

Bake in preheated oven until a toothpick inserted in the center comes out clean, about 1 hour. Cool in pan on a rack 1 hour. Remove sides of pan before serving.
If you like this recipe, feel free to Tweet it, Facebook it, or just email it by clicking the “share” button below. 🙂

SaveSave

Fresh Peach and Blackberry Trifle

I just love Sundays when I can spend all day in the kitchen trying out new recipes.  Now that it’s summer, our neighborhood produce stand is up and running, and this week they had their fresh Fredericksburg peaches.  Yay!  I wait all year long for these, and when they finally arrive, it’s time to pull out all the stops and…BRING ON THE PEACH DESSERTS!!

This trifle is not only pretty, but really delicious.  It’s perfect for a large crowd or to take to a potluck.  Leave your diets at home…you won’t be sorry! 🙂

Fresh Peach and Blackberry Trifle

Fresh Peach and Blackberry Trifle

Fresh Peach and Blackberry Trifle

Ingredients:

  • ¼ cup plus ⅔ cup sugar, divided
  • ¼ cup fresh lemon juice
  • ¼ teaspoon almond extract
  • 1 pre-made angel food cake or pound cake
  • 2 (8 oz) pkgs cream cheese (room temperature)
  • 2 cups heavy cream (room temperature)
  • 3 cups fresh peaches
  • 3 cups fresh blackberries

Preparation:

In small saucepan, heat lemon juice, ¼ cup sugar and ¼ cup water over medium high heat.  Stir until sugar dissolves, then remove from heat and stir in almond extract.

Cut cake into 1 inch slices, brush both sides with the lemon/sugar liquid, then cut into 1 inch squares.

Beat cream cheese and remaining ⅔ cup sugar with mixer on medium speed until smooth.  Slowly add in the cream, beating constantly, until mixture is smooth and the consistency of whipped cream.

Cut peaches into small pieces and combine with blackberries.  In a trifle bowl, lay about ⅓ of the cake squares on bottom, followed by ⅓ of the fruit, then ⅓ of the cream mixture.  Continue these layers ending with fruit on top.

Cover with plastic wrap and refrigerate for about an hour.

Liz’s Tidbits:

  • Try this with any combination of fruit you desire.  Try strawberries and blueberries for the 4th of July!  🙂

If you like this recipe, feel free to Tweet it, Facebook it, or just email it by clicking the “share” button below. 🙂

Chocolate Truffle Tart with Kahlúa Whipped Cream

If there’s one dessert that’s most often requested from me, it’s this one.  A simple crust of chocolate wafers filled with a creamy dark chocolate ganache then glazed with a layer of more chocolate and Kahlúa makes for a showstopper of a dessert!   I like to top it with Kahlúa whipped cream, but it could also be served with fresh berries or even a white chocolate cream sauce.  This is a chocolate lover’s HEAVEN!  Think DARK, RICH VELVET-Y CHOCOLATE!  Your guests will be amazed.  🙂


Chocolate Truffle Tart with Kahlúa Whipped Cream

Chocolate Truffle Tart with Kahlúa Whipped Cream

Chocolate Truffle Tart with Kahlúa Whipped Cream

Crust:

  • 32 chocolate Nabisco wafers, finely ground
  • 7 tablespoons unsalted butter, melted
  • 1/4 cup sugar

Filling:

  • 1 1/4 cups heavy cream
  • 9 ounces (1 1/2 cups) bittersweet chocolate, chopped (I use Ghirardelli 60% cacao bittersweet baking bars)
  • 2 extra-large eggs, at room temperature
  • 1 teaspoon pure vanilla extract
  • 1/2 teaspoon espresso powder
  • 1/4 teaspoon kosher salt

Glaze:

  • 2 tablespoons heavy cream
  • 13/4 ounces (1/3 cup) bittersweet chocolate
  • 1 teaspoon light corn syrup
  • 1 tablespoon Kahlúa

Garnish:

  • Kahlúa Whipped Cream (recipe follows)
  • Chocolate-covered coffee beans

For Crust: Heat oven to 350°. In medium bowl, stir together cookie crumbs, butter and sugar until moistened. Press evenly onto bottom and up sides of 9-inch fluted tart pan with removable bottom. Place tart pan on baking sheet and bake until firm, about 10 minutes. Cool on rack for 15-20 minutes.

For Filling: In small saucepan, bring cream to a boil. Place the chocolate in medium-sized bowl and pour hot cream over chocolate; let stand for 5 minutes. Gently stir mixture until smooth. In separate bowl, whisk together eggs, vanilla, espresso powder and salt. Stir egg mixture into chocolate mixture.

Pour filling into cooled crust. Bake until filling is set about 3 inches from edge but center is still wobbly, about 20-25 minutes. (The filling will continue to set as it cools). Cool completely in the pan on a rack for at least 1 hour.

For Glaze: In small saucepan, bring cream to a boil. Add chocolate and stir until smooth. Stir in corn syrup and Kahlúa.

Pour glaze onto cooled tart, tilting and rotating so glaze evenly coats the top. Allow tart to stand until glaze is set, about 1 hour.

For Garnish: Garnish with rosettes of Kahlúa Whipped Cream and chocolate-covered coffee beans if desired.

Kahlúa Whipped Cream:

  • 1 cup chilled heavy whipping cream
  • 1/2 cup powdered sugar
  • 3 tablespoons Kahlúa

Chill mixing bowl and beaters. Add cream to chilled bowl and whip with powdered sugar until soft peaks form. Add Kahlúa and combine.

Liz’s Tidbits:

  • Tart can be chilled up to 3 days. Cover loosely after tart is completely chilled (covering before may cause condensation).
  • Crust, without filling, can be made 1 day ahead and kept, covered, at room temperature.
  • If you like a really dark bitter chocolate, then use a higher percentage chocolate.  I’ve used up to 72% with success, but I’ve found the 60% bars to be the most widely available and to most chocolate lovers’ liking.

If you like this recipe, feel free to Tweet it, Facebook it, or just email it by clicking the “share” button below. 🙂

Chocolate Drizzled Cappuccino Macaroons

I’m a huge fan of both coffee and coconut, so when I saw these Cappuccino Macaroons in my Fine Cooking Magazine, I knew they’d be on my kitchen counter soon!

Not to be confused with the French Macarons (pronounced mah-kah-ROHNS), the delicate meringue sandwich-like cookies made with egg whites and almond flour, these macaroons (pronounced mah-kah-ROONS) are a southern coconut cookie made with egg whites and shredded coconut (NO flour).  They have a soft pillowy center with a golden crisp outside, and they’re very easy to make in comparison to the French Macaron which takes far more finese on the part of the baker.  I decided to make them a little more decadent and drizzled them with dark chocolate. They were a HIT! 🙂

Chocolate Drizzled Cappuccino Macaroons

Chocolate Drizzled Cappuccino Macaroons

Chocolate Drizzled Cappuccino Macaroons

Chocolate Drizzled Cappuccino Macaroons

Fine Cooking Magazine

makes about 20 cookies

Ingredients:

  • 1 cup sweetened condensed milk (a little less than the whole can)
  • 1-½ teaspoons instant espresso powder
  • ¼ teaspoon ground cinnamon
  • ¼ teaspoon pure vanilla extract
  • 4-½ cups (14 oz) sweetened shredded coconut
  • 2 large egg whites
  • ¼ teaspoon kosher salt

 Preparation:

Place oven racks in the top and bottom thirds of the oven and preheat to 350°.  Line 2 large rimmed baking sheets with Silpat or parchment paper.

Combine the condensed milk, espresso powder, cinnamon, and vanilla in a large bowl. Add the coconut and stir with a large silicone spatula until thoroughly mixed.

Beat egg whites and salt with an electric mixer on medium speed until stiff peaks form, about 4 minutes. Using the spatula, fold the whites into the coconut mixture pushing it together into a mound.

With wet hands or two wet spoons, gently form rounded tablespoonfuls of batter into balls about 1-1/2 inches in diameter. Arrange 2 inches apart on the baking sheets.

Bake, rotating and swapping the positions of the pans halfway through, until the macaroons are golden brown in spots and their undersides are lightly browned, 20-25 minutes. Start checking them at about the 15 minute mark.

Cool briefly on the baking sheets, then transfer the macaroons directly to the racks to cool completely.

Liz’s Tidbits:

Mine were done and sufficiently browned at about 17 minutes.  Keep a close eye on them or they will get too brown.

The macaroons will keep, uncovered at room temperature, for up to 3 days, or refrigerated in an airtight container for up to 3 weeks. They can also be frozen for up to 6 months.

If you like this recipe, feel free to Tweet it, Facebook it, or just email it by clicking the “share” button below. 🙂

Still Haven’t Made Valentine’s Reservations?

By now, if you haven’t made dinner reservations for Valentines, it’s a pretty safe bet that you won’t be dining out! Don’t sweat it, though, as I have a few last minute ideas for cooking at home! Let’s face it, restaurants are going to be packed, and even if you could get reservations, who wants to fight the crowds? Stay home, light some candles and enjoy a nice dinner with your sweetie!

How about

Steak with Brandy Mustard Sauce

Not in the mood for steak?  How about

Shrimp Scampi Pasta

or

Pan Sautéed Redfish with Corn Tomato Avocado Relish

For dessert, this might just satisfy your chocolate craving!

Easy Chocolate Kahlua Mousse


HAPPY VALENTINE’S DAY!

Double Heart

If you like this post, feel free to Tweet it, Facebook it, or just email it by clicking the “share” button below. 🙂

Say I Love You with Chocolate Covered Strawberries

Chocolate Covered Strawberries

Chocolate Covered Strawberries-Easier than you think!

Chocolate and strawberries…a match made in heaven!  With Valentines Day fast approaching, all the grocery stores are going to have these little gourmet treats made up and ready for you to take home to your sweetie!  The problem is, unless you’re shopping at your local chocolatier, they usually look better than they taste, and their price tag is pretty hefty!

These fancy little treats are surprisingly very easy to make at home, giving you the ability to choose your own chocolate. I love making mine with a good dark chocolate (think Valrhona), but any chocolate you like will work just fine.  You can decorate them with drizzled white chocolate, crushed nuts, coconut, mini chocolate chips, toffee bits or whatever strikes your fancy!  I’ve even been known to inject them with some Grand Marnier or other liqueur on occasion to really elevate them to fancy! The choices are only limited by your imagination!

Ingredients:

  • 1 lb strawberries, washed and dried thoroughly
  • 6 oz chocolate (your choice), chopped
  • 3 oz white chocolate, chopped (for drizzling)
  • 1 teaspoon coconut oil or vegetable shortening, divided
  • Mini chocolate chips, nuts, coconut, toffee bits, etc, optional (for decorating)

Preparation:

Check out this GREAT VIDEO showing you step-by-step instructions for creating these beautiful gourmet treats for the one you love! Happy Valentines!

Double Heart


If you like this post, feel free to Tweet it, Facebook it, or just email it by clicking the “share” button below. 🙂

Lemon Cake

Lemon cake…sweet, moist, tart lemony goodness.

Still on my quest for all things lemon, I came across this cake by Ina Garten.  I’d had great success with her recipe for homemade lemon curd, so when I saw this cake,  I had no doubt it would be just as delicious.  This recipe makes two loaves, and my kitchen smelled absolutely wonderful all morning!  There’s just something about a cup of coffee in the morning with a warm slice of lemon cake…all warm and fuzzy, just like your favorite PJs!

Lemon Cake

Lemon Cake

Lemon Cake

Ina Garten

makes 2 loaves

Ingredients:

2 sticks unsalted butter, room temperature
2 1/2 cups sugar, divided (use part for the cake and part for the syrup)
4 large eggs, room temperature
1/3 cup grated lemon zest (6 to 8 large lemons)
3 cups flour
1/2 teaspoon baking powder
1/2 teaspoon baking soda
1 teaspoon kosher salt
3/4 cup freshly squeezed lemon juice, divided (use part for the cake and part for the syrup)
3/4 cup buttermilk, room temperature
1 teaspoon pure vanilla extract

Preparation:

Preheat oven to 350°F. Spray 2 full sized loaf pans with Bakers Joy (or grease and flour by hand).  Line bottoms of pans with parchment paper and then spray the top of the parchment paper, too. This keeps the cake from sticking to the pan. Not necessary, but helpful.

Cream butter and 2 cups of the sugar in the bowl of an electric mixer until light and fluffy, about 5 minutes. With the mixer on medium speed, add eggs, 1 at a time, and the lemon zest.

In a separate bowl, sift together the flour, baking powder, baking soda, and salt. In another bowl, combine 1/4 cup of the lemon juice, the buttermilk and vanilla. Add the flour and buttermilk mixtures alternately to the batter, beginning and ending with the flour. Divide evenly between the 2 pans, smooth the tops, and bake for 45 minutes to 1 hour, until a cake tester comes out clean.

Lemon Syrup:

Combine the remaining 1/2 cup sugar and 1/2 cup lemon juice in a small saucepan and cook over low heat until the sugar dissolves. When the cakes are done, allow to cool for 10 minutes. Remove cakes from the pans and set on a rack set over a tray or sheet pan.  Poke holes in the tops of the cake and spoon the lemon syrup over. Allow the cakes to cool completely.

Liz’s Tidbits:

  1. The recipe calls for a lemon glaze to be drizzled over the top of the cake (2 cups powdered sugar, sifted, mixed with 3 1/2 tablespoons freshly squeezed lemon juice).  I omitted this as it was plenty sweet to my taste without it.
  2. Instead of zesting the lemons (which is SOOO time consuming), I use a shortcut by peeling my lemons with a vegetable peeler (do this lightly so as not to get any of the white pith).  Add the peel along with the sugar to a food processor and blitz until the peel is finely chopped. Then add this lemon sugar to the butter and cream until light and fluffy.  SOOO much faster!  You can also use this lemon sugar to make a scrub…Just add heated coconut oil and voila!  You have a lemon scrub that smells GREAT! 🙂


If you like this recipe, feel free to Tweet it, Facebook it, or just email it by clicking the “share” button below. 🙂

Lemon Posset

My journey down “Lemon Lane” continues with this delicious Lemon Posset.

For you San Antonio locals, you may have had this dessert at the restaurant “Picnikins Patio Cafe”.  It’s one of their signature desserts, and I was lucky enough to see the recipe posted in the newspaper years ago.  They serve theirs with “the crispest ginger thins you can lay your hands on”.

So what IS posset?  Well, today’s definition refers to a dessert make of thickened cream and flavored with fresh lemon juice (think lemon pudding).  Historically, though, posset was “a hot drink of sweetened and spiced milk curdled with ale or wine.” Shakespeare actually wrote of posset in Macbeth… (a bit of dinner table trivia!) 🙂

(Lady Macbeth – Act 2, Scene2)
“The doors are open, and the surfeited grooms
Do mock their charge with snores. I have drugged their possets,
That death and nature do contend about them,
Whether they live or die.”
This lemon posset is insanely easy (3 ingredients) and insanely delicious, delivering that “WOW” factor with very minimal effort!  A showstopper of a dessert that’s definitely on my short list of favorite, go-to recipes.
Lemon Posset

Lemon Posset

Lemon Posset

recipe from Picnikins Patio Cafe, via San Antonio Express News Newspaper

makes 6 (4oz) servings

Ingredients:

  • 2 cups heavy whipping cream
  • ¾ cup sugar
  • ⅓ cup strained “fresh” lemon juice (NO substitute!)

Preparation:

Put cream and sugar in a saucepan and bring to a simmer over medium heat, whisking constantly.  Once at a simmer, continue whisking for 3 minutes, adjusting the heat as necessary to keep at a simmer. Remove from heat, stir in the strained fresh lemon juice, and pour into serving bowls (I like to use miniature martini glasses) and refrigerate for at least 4-5 hours.

Liz’s Tidbits:

  • Set a timer when the mixture reaches the “simmer” stage, so you let the mixture do its “magic” for 3 minutes exactly.
  • While the recipe calls for 3 hours in the fridge, my experience has been AT LEAST 4-5 hours.  Any less time, and it doesn’t “set” properly.  This is a great “make ahead” dessert to prepare either the day before or the morning of a dinner party.  Serve cool, straight from the refrigerator.

If you like this recipe, feel free to Tweet it, Facebook it, or just email it by clicking the “share” button below. 🙂